
How to Automate Sending Data or Trigger Notifications from Snowflake to Email


TL;DR
Article delves into three efficient methods for automating the transfer of data or triggering notifications from Snowflake to email:
Method 1: Manual Custom Script Setup:
- Install the Snowflake Connector
- Use run_snowflake_query function to executes a query in the Snowflake warehouse and returns the results.
- Use send_email_via_ses function to trigger an email using SMTP and AWS SES.
- Schedule the Python script using Cron to run at specified intervals.
Method 2: Using Internal Snowflake Functions:
- Write a transaction which runs the query, stores it in a snowflake scripting variable.
- Encapsulate the SQL logic into a stored procedure.
- Set up a Snowflake Task that calls the stored procedure at scheduled intervals.
- Ensure the Task is active to commence scheduled runs.
Method 3: Send Data to Email through Locale:
- Connect the Snowflake database, and write the SQL query to set up the alert condition.
- Set the alert frequency and recipients for email notifications.
- Locale will automatically run it and send emails based on the defined schedule.
While the first two methods require manual setup and are labor-intensive, Locale.ai provides a simple and automated solution for sending emails from Snowflake. With dynamic recipient selection, clear playbook setup, and escalation rules, Locale.ai streamlines the process of automating email notifications, making it the preferred choice for efficient workflow management.
For any business, observability plays a major role in its success and sending data from Snowflake to Email seems like an obvious thing. It allows you to use your data warehouse as a central system to power other functions/departments. There can be a variety of use cases that can be solved by automating sending data from Snowflake to email such as:
- Real-time alerts for critical database events such as sudden spikes in traffic or potential security breaches
- Automate sending daily/weekly sales reports to your sales team
- Automated inventory level report to biz ops teams
...and many more. However, Setting up email notifications from Snowflake can be a daunting task. In this detailed guide, we’ll walk you through three straightforward methods to seamlessly transfer data or receive email alerts from Snowflake.
You can create a custom Python script that uses the Snowflake connector library in Python to run a query, store the results, and send it as an email using SMTP using a service like say AWS SES. Here is a step-by-step process to do it:
1. Install the Snowflake Connector
2. Run run_snowflake_query function
This function uses the snowflake connector available in Python to run a query in our snowflake warehouse and return the query results.
3. Run send_email_via_ses function
We get the results from the run_snowflake_query function and use them to trigger an email using the send_email_via_ses function.
4. Schedule the script with Cron
Once you have the script ready with the above two functions, let’s add a cron to run this script on a given cron schedule. Open the cron table to add a new cron job.
This will open the cron table in an editor. Add a new line to schedule your Python script. For example, to run it every 5 minutes, add:
Save and exit the editor to activate the new cron job. By following these steps, your Python script will now run every 5 minutes, just like a cron job
Snowflake offers Sending Email Notification functionality which can allow you to create a stored procedure to send an email to a fixed email address.
Writing the Query
Once you have the above set, you need to write a transaction which runs the query, stores it in a snowflake scripting variable and uses the stored procedure to send the results to the email.
Automating the SQL query
Create a Stored Procedure
Firstly, encapsulate your SQL logic into a stored procedure. This is necessary because Snowflake Tasks can only invoke stored procedures. The stored procedure provides the logic that the task will execute.
Define the Task
Once the stored procedure is in place, create a Snowflake Task that calls it. Here, you specify the virtual warehouse to run the task and how often it should run, using a cron-like schedule format.
Activate the Task
Tasks are not active by default. After defining the task, you need to activate it to start the scheduled runs.
By far, the above two methods are a labour-intensive way of sending emails from your Snowflake warehouse. You have to custom-create the code. There are multiple shortcomings to these such as, you have to set up multiple services yourself and setting rules over the data sent is hard. Also, if you are required to dynamically choose a person to send an email, the above methods would fall short and you have to create an n-number of tasks to send data to these people. You should adopt these methods, only if sending emails is the one-off thing for you.
If you want to set up an easy automated way that can run queries and send emails on a pre-set schedule, also allows you to dynamically send to people based on query results. You should check out the 3rd method.
If you’re looking for a better way to automate sending data from Snowflake to Email without all the unnecessary complex setups, use Locale. Setting up through the locale is an easy deal.
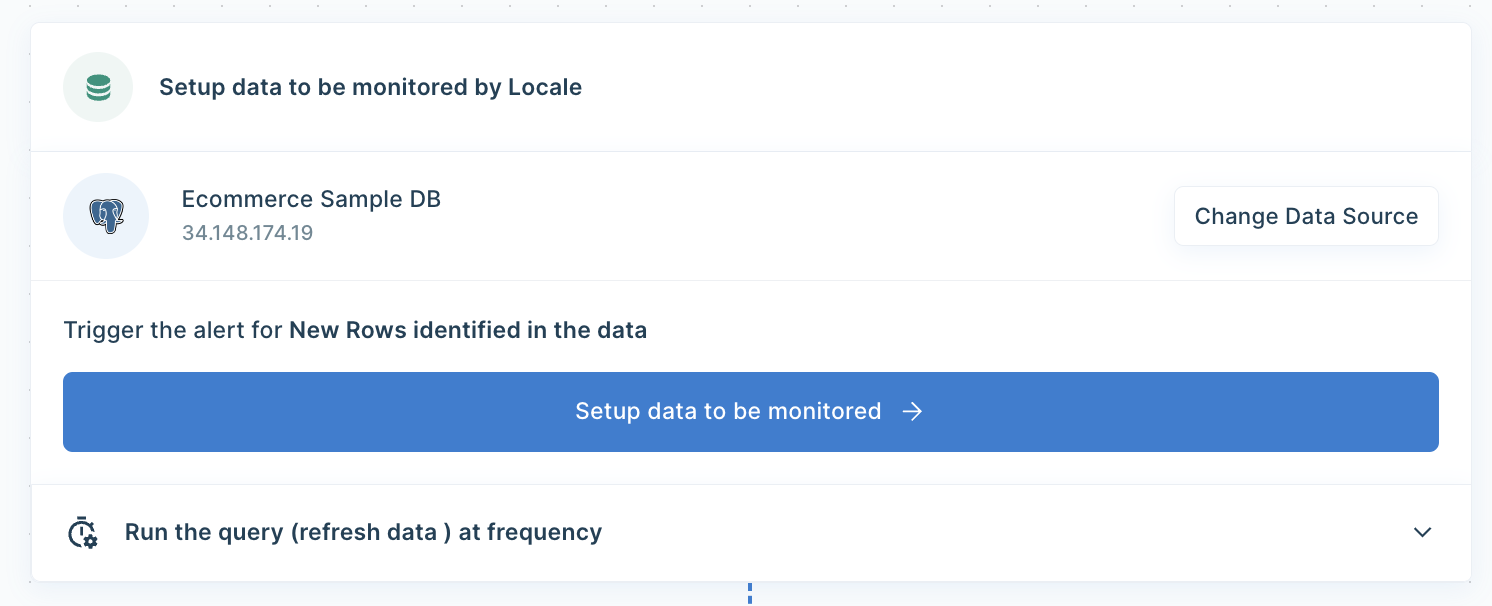
Login to Locale, Go to Org Setting and Connect Snowflake from the data source. Now you are ready to set up your rules and frequency of sending emails.
Go to Alerts → Create New Alerts. Choose your Snowflake Database → Click on Setup data to be monitored.
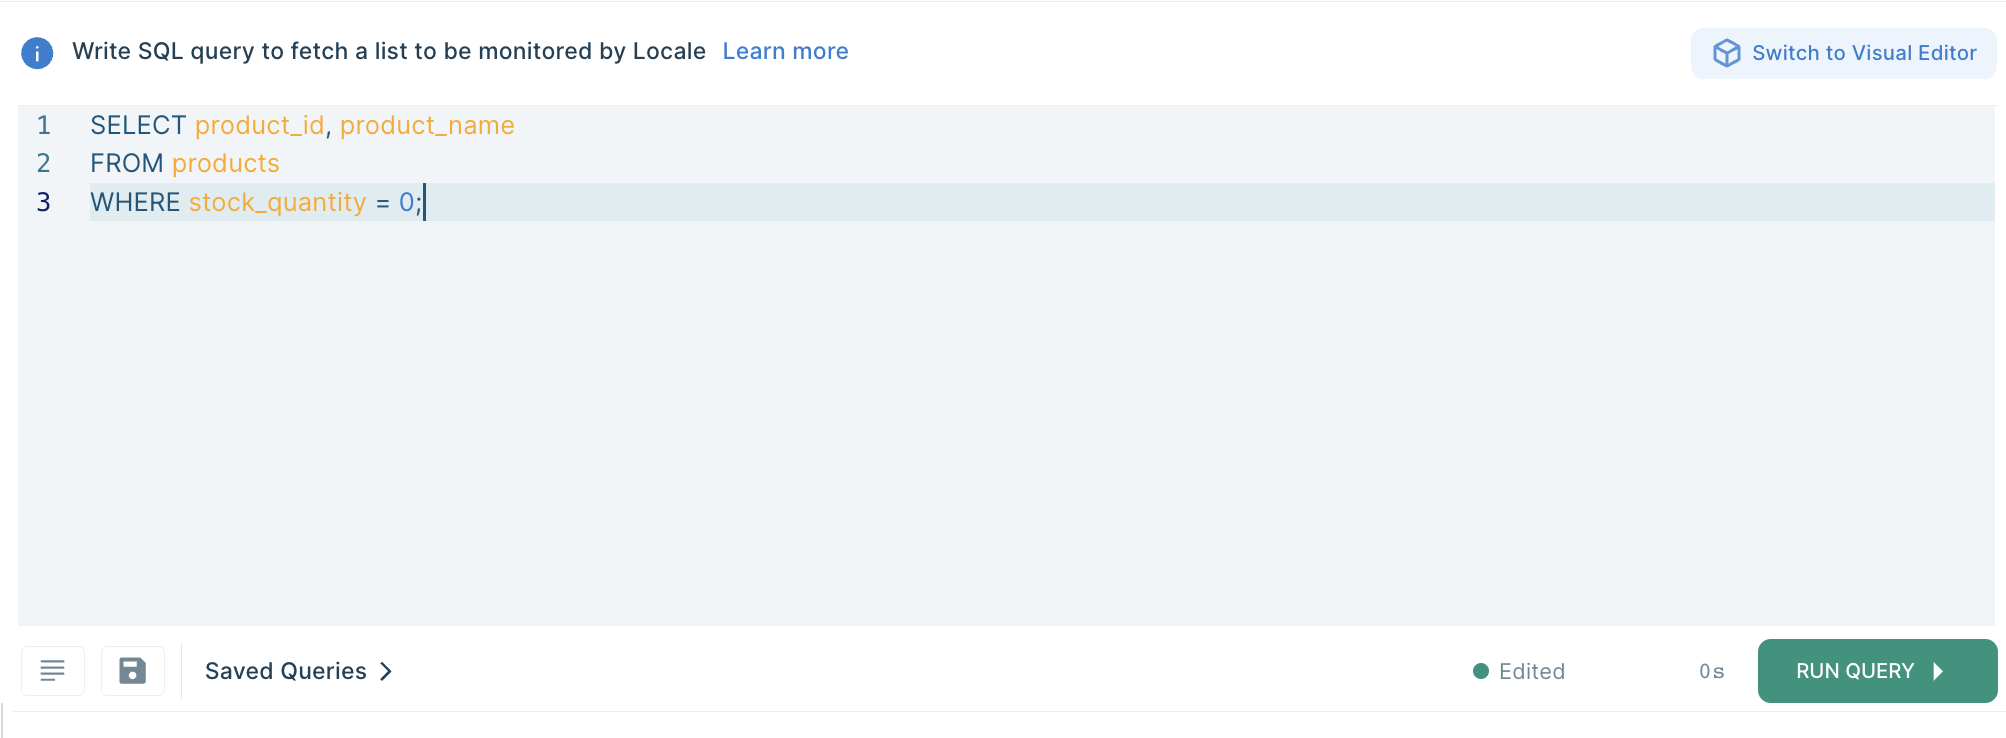
Write SQL Query to set the alert condition that will send an email when the query results match:
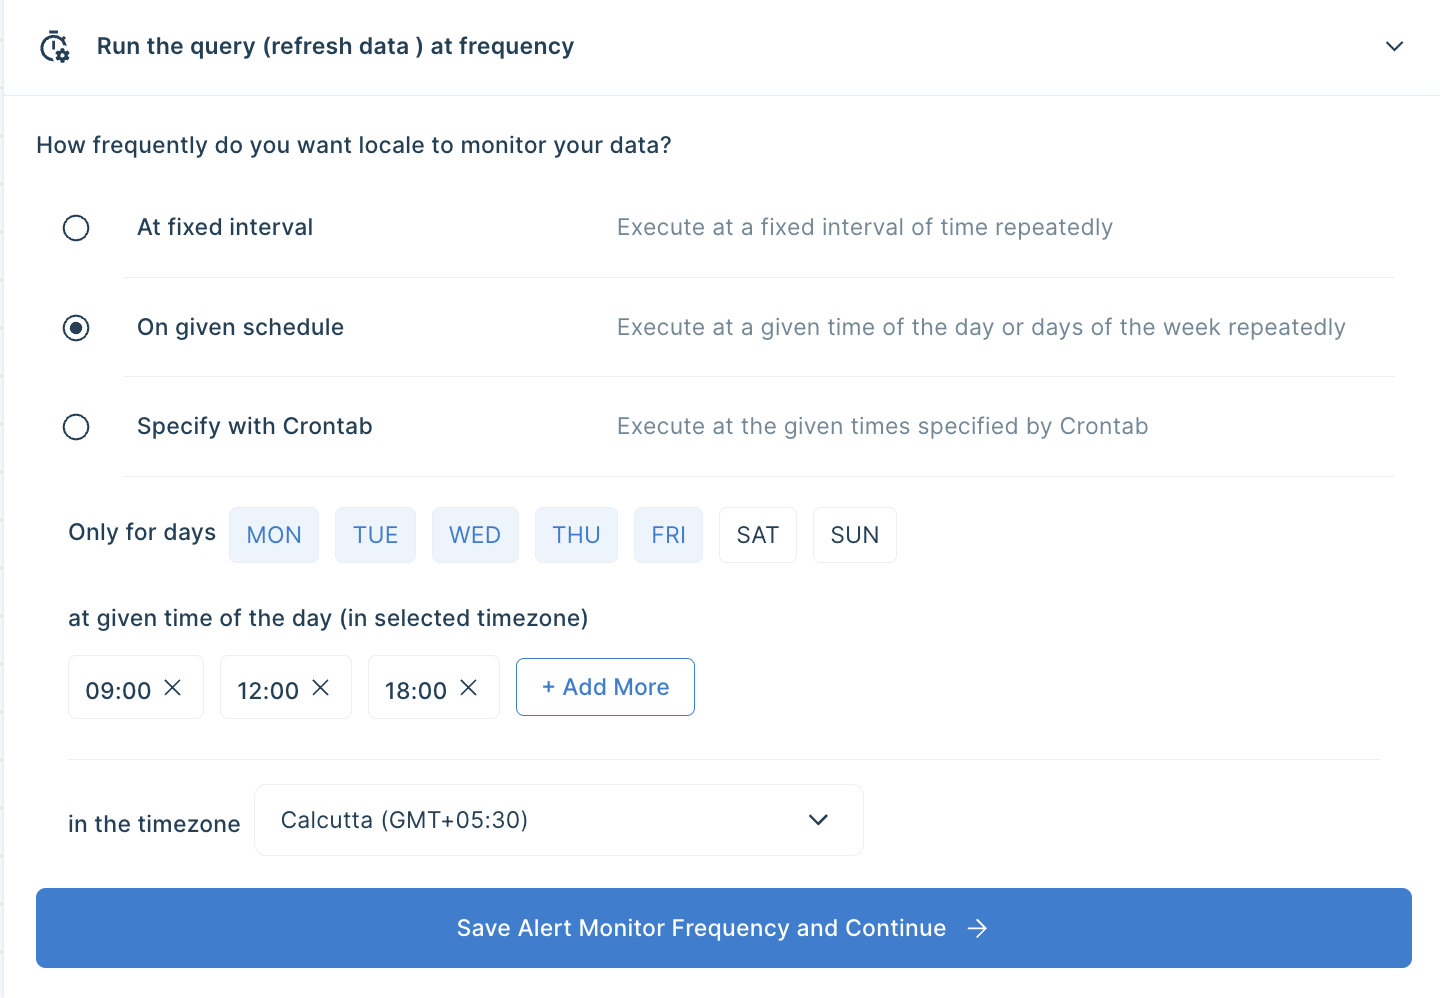
Now Set Alert Frequency, this will automatically run the query and send an email based on the frequency you set.
Final Step, you can set up whom the email should be sent. You can click on Add Notification/action from the Setup Notification/Action section. Now click on Email Subscribers and add all the email addresses to whom you want to send emails.
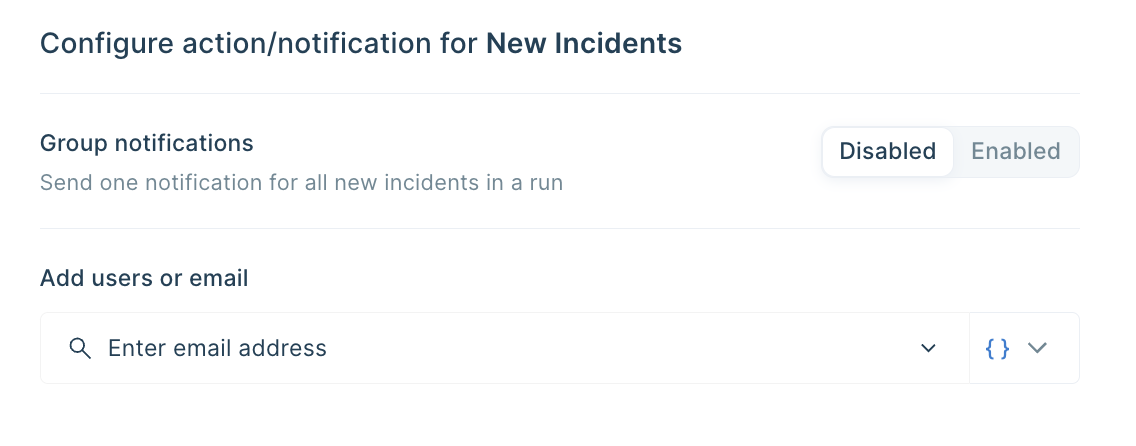
You can also dynamically send emails based on query results by selecting from { } icon
Save the alert and it will automatically run itself and send emails.
Conclusion
Now you have 3 methods to send data or get notified by email from your Snowflake warehouse. The first two methods can be a quick way to get it done if it is a one-off situation, but those can be extremely time-consuming if you need to do this more than a few times.
If you want to automate sending emails from your Snowflake warehouse, you should choose Locale(3rd method). It is very easy and quick to set up. You can dynamically choose people to send email based on the query result, also provide you the option to choose a schedule of sending email based on your requirement.
It also allows you to set up and provide a clear playbook for users to follow so that issues can be resolved efficiently and set up an escalation rule to ensure issues are being resolved. Moreover, if you want to expand sending reports/data to other destinations like Slack, Whatsapp, MS Teams etc, you get to do that very easily. It allows you to spend less time building or working on integrations and more time doing other great things.
Excited to get started? It takes less than 10 minutes to get all things set up: Try for free

