
How to Send Data or Trigger Notifications from Postgres to WhatsApp


TL;DR
Sending real-time notifications from PostgreSQL to WhatsApp can be achieved through traditional methods involving Python integration or using a no-code platform like Locale.
Method 1: Traditional Approach Using PostgreSQL NOTIFY/LISTEN with Python and WhatsApp Integration:
- Create a trigger function in PostgreSQL to listen for specific events.
- Set up a WhatsApp Business Account and obtain API keys.
- Create a message template for WhatsApp messages.
- Develop a Python webhook to listen for database notifications and send WhatsApp messages using the obtained API keys.
Method 2: No-code WhatsApp integration with Locale.ai:
- Connect your database to Locale.ai.
- Set up frequency to automatically run SQL queries.
- Configure WhatsApp message templates and recipients to receive alerts automatically.
Both methods provide ways to automate PostgreSQL notifications to WhatsApp, the traditional approach comes with challenges in setup, maintenance, and security. In contrast, the no-code solution provided by Locale.ai simplifies the process and offers flexibility in message customization all that without the need for an additional WhatsApp Business Account.
In the fast-paced world of data management, staying updated with real-time database changes is crucial. While email and Slack notifications have been the norm, the rise of instant messaging platforms like WhatsApp offers a new avenue for immediate and accessible alerts. This blog explores how to automate PostgreSQL triggers to send notifications directly to WhatsApp, enhancing the speed and convenience of database monitoring.
- Method #1: Traditional Approach Using PostgreSQL NOTIFY/LISTEN with Python and WhatsApp Integration
- Method #2: No-code WhatsApp integration with Locale
Method 1: Traditional Approach Using PostgreSQL NOTIFY/LISTEN with Python and WhatsApp Integration
Step 1: Create a Trigger Function in PostgreSQL:
- This function will be executed whenever a specified event (like an INSERT or UPDATE) occurs in the database.
- Example SQL script to create a trigger function:
- This function sends a notification to the order_updates channel with the new row data in JSON format whenever an order's status changes to 'completed'.
Create a Trigger:
- Link the trigger function to a specific table and event.
- Example SQL script to create a trigger:
- This trigger executes the notify_order_status_change function after each row update in the orders table.
Step 2: Setting Up WhatsApp Business Account
If You Don't Already Have a Business Account:
1. Create a Meta Business Account:
- Visit Meta Business and create a new business account.
- Provide your business name, email address, and other required details.
.png)
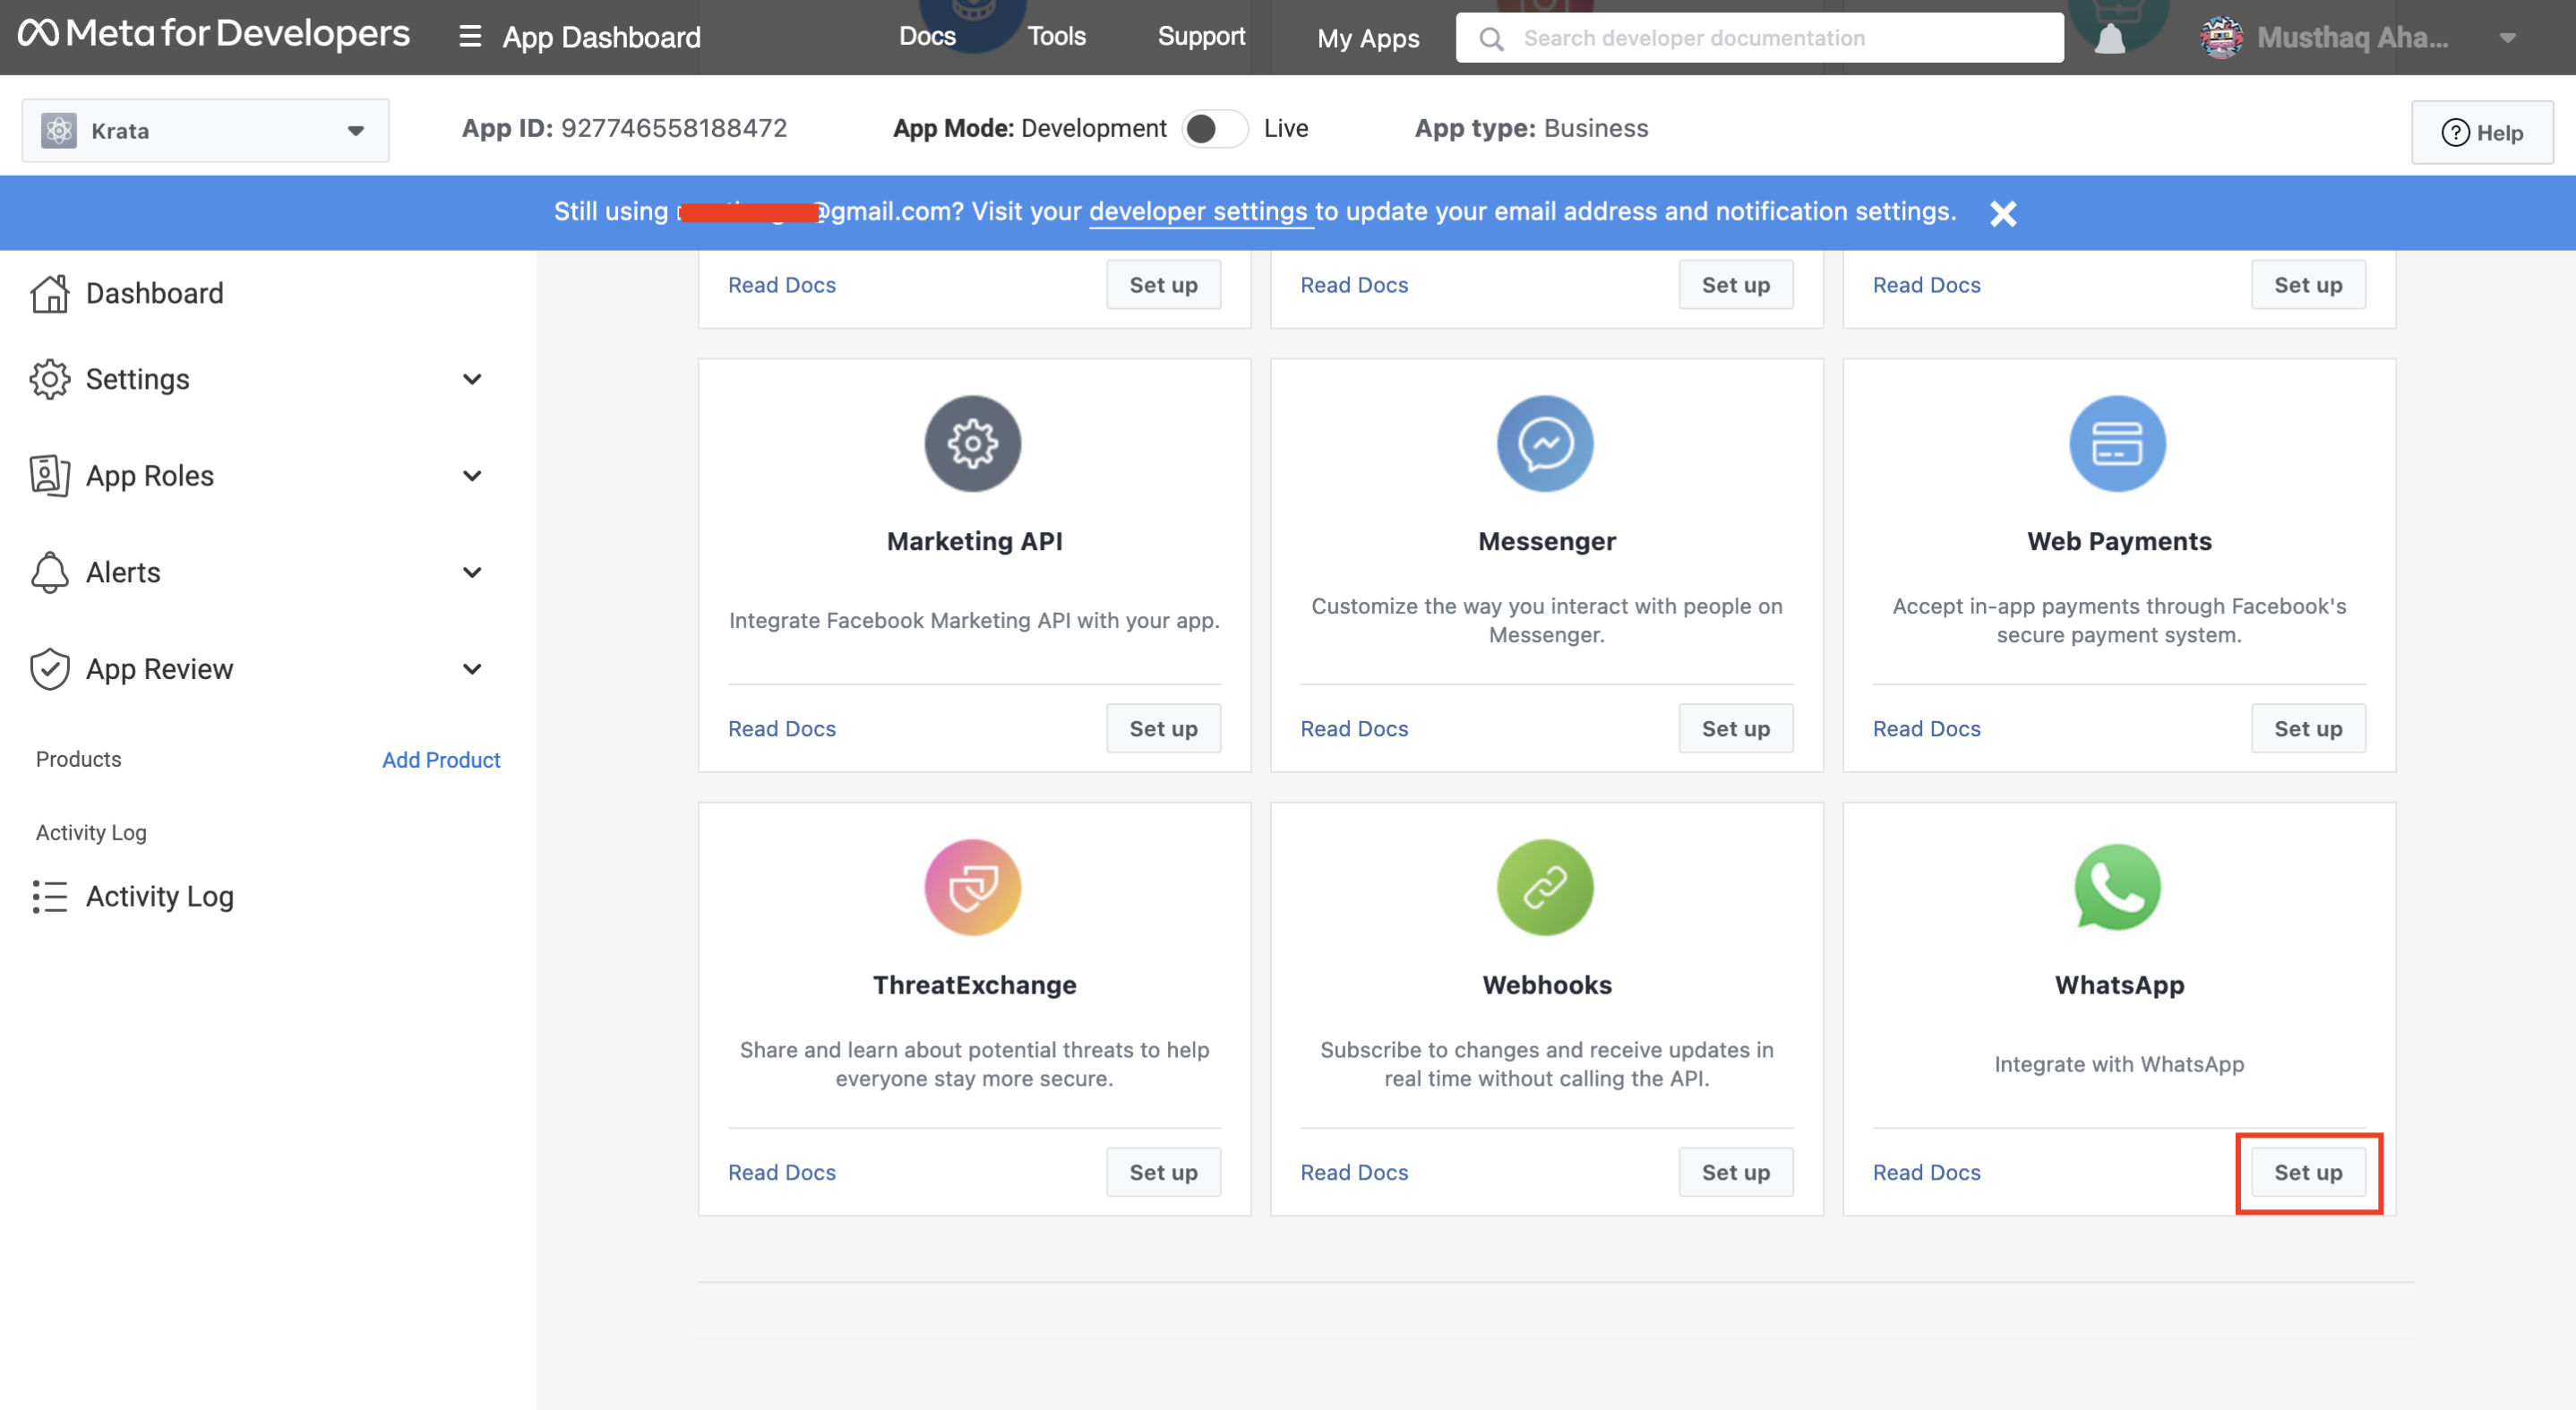
2. Set Up a Meta Developer Account and WhatsApp Business Account:
- Go to Facebook for Developers and set up a developer account.

- Verify your account using your mobile number and email.
- Create a new app for your business to manage WhatsApp communications.
3. Connect WhatsApp Business Account to Your App and Generate API Keys:
- In your Meta Business account settings, add your phone number to the WhatsApp Accounts section.
- Create a System User in the Meta Business account and generate API keys for WhatsApp messaging.
.png)
.png)
4. Finding Your Phone Number ID:
- Once your WhatsApp Business account is set up, you can find your Phone Number ID in the WhatsApp Accounts section of your Meta Business settings.
- You can also use the APIs provided here to obtain your Phone Number ID: https://developers.facebook.com/docs/whatsapp/business-management-api/manage-phone-numbers#all-phone-numbers
If You Already Have a Business Account:
- Directly proceed to integrate your existing WhatsApp Business account with Locale and retrieve your Phone Number ID as mentioned above.
Creating a WhatsApp Message Template
Setting up a message template in WhatsApp Business is essential because WhatsApp requires pre-approval for the messages sent by businesses to ensure they comply with their guidelines and to prevent spam. These templates are used for outbound messages to customers who have not interacted with your account in the last 24 hours.
Steps to Create a Message Template:
Access Your WhatsApp Business API Dashboard:
- Log in to your Facebook Business Manager.
- Navigate to the WhatsApp Accounts section and select your WhatsApp Business account.
Go to the Message Templates Section:
- Inside your WhatsApp Business account settings, find and click on the 'Message Templates' section.
Create a New Template:
- Click on the ‘Create Template’ button.
- Provide a name for your template. This name will be used to reference the template in your API calls.
- Choose a category that best describes the purpose of your message (e.g., transactional, account update, alert update).
Design Your Template:
- Enter the content of your message. You can include placeholders ({{1}}, {{2}}, etc.) for variables (like customer name, order ID, etc.) that will be dynamically inserted into the message.
- Example: "Your order {{1}} is confirmed and will be delivered on {{2}}. Thank you for shopping with us!"
Submit for Approval:
- Once you have created your template, submit it for approval.
- WhatsApp will review the template to ensure it meets their guidelines. The review process usually takes up to 48 hours.
Step 3: Python Webhook for PostgreSQL Trigger and Sending WhatsApp Messages
Replace your_access_token, your_template_name, and phone_number_id with your actual WhatsApp Business account details and template name. You can check out the API docs for more details on its functionality: https://developers.facebook.com/docs/whatsapp/cloud-api/guides/send-message-templates
Drawbacks
- Complex Setup: The process of setting up and integrating a WhatsApp Business account with PostgreSQL triggers is complex and time-consuming.
- WhatsApp Business Account Limitations: Setting up a WhatsApp Business account can be lengthy, requiring business verification and credit card details.
- Handling API Errors: Managing the Graph Facebook API for WhatsApp involves handling various errors and managing API rate limits.
- Maintenance Overhead: Continuous monitoring and maintenance are required to ensure smooth operation.
- Security Concerns: Ensuring data privacy and managing secure connections can be challenging, especially when handling sensitive customer information.
- Limited Flexibility: The use of templates in WhatsApp Business can limit the flexibility of the messages you can send, as each template must be pre-approved by WhatsApp.
Method #2: No-code WhatsApp integration with Locale
Locale no-code platform offers an easy way to setup sending data or triggering alert to WhatsApp without you need to purchase an additional WhatsApp Business Account saving you thousands of dollars and complex setup and maintenance. With just few clicks, you can setup WhatsApp alert directly from your database.
Step 1: Setup Datasource and WhatsApp Business Account.
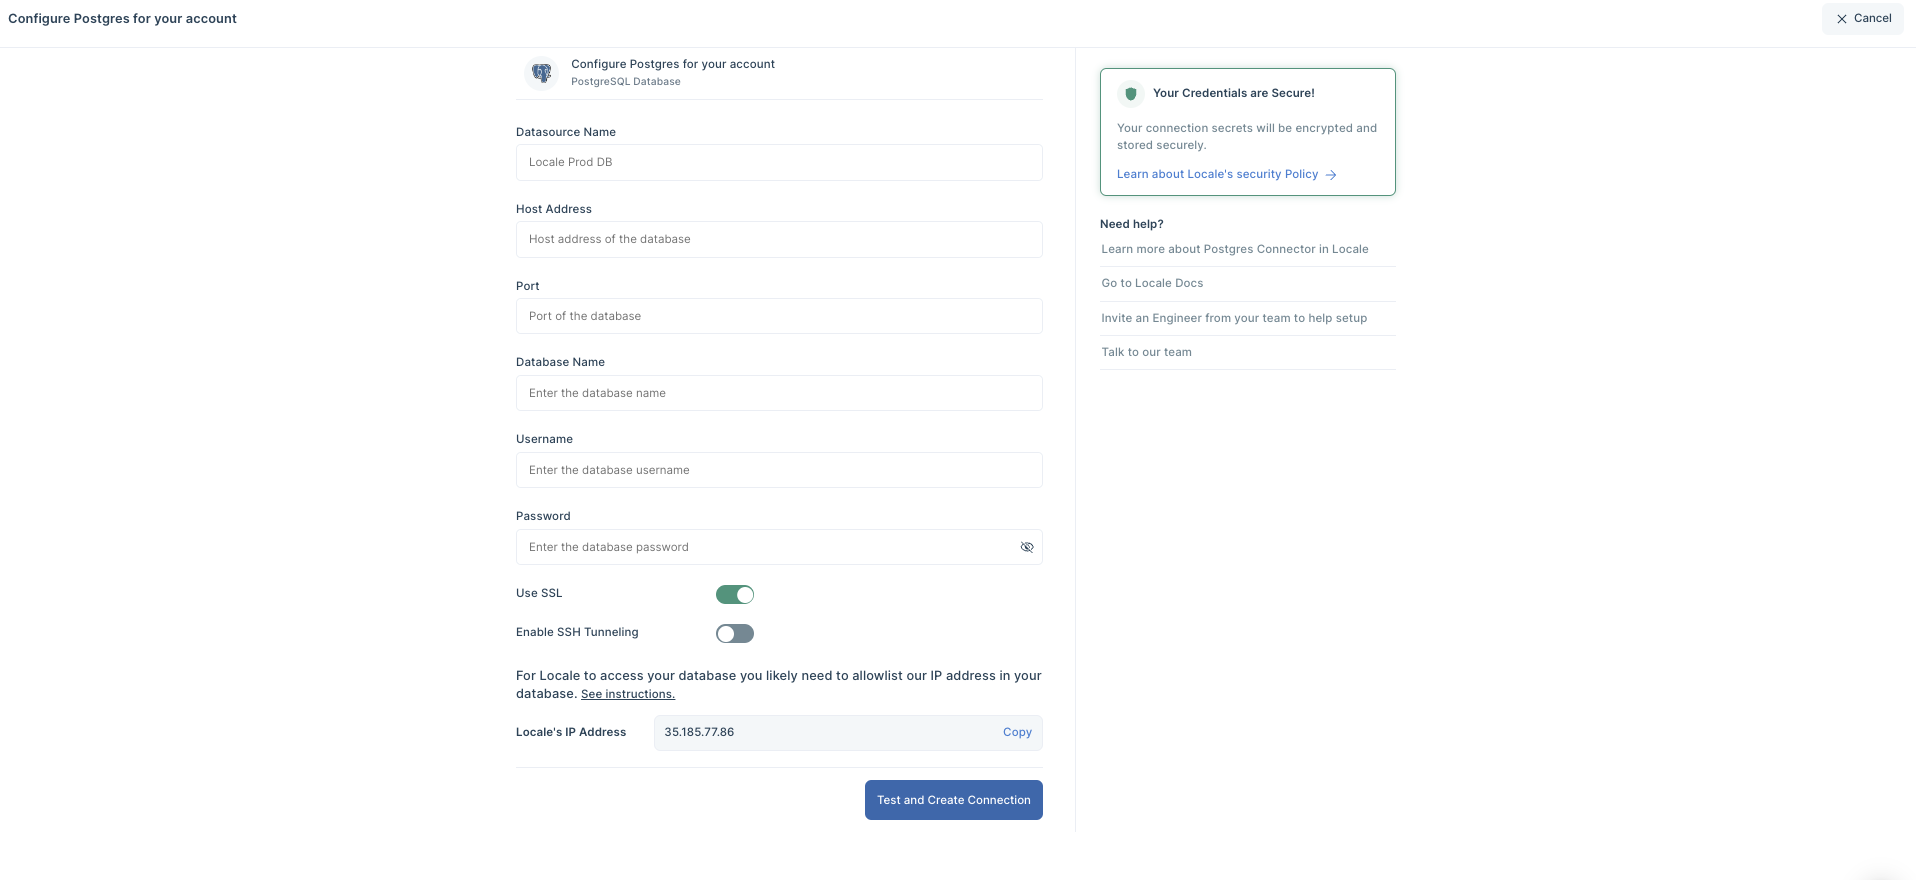
Login to Locale, Go to Org Setting. On the Datasources tab → Connect your database from the data source.
Locale gives you flexibility to setup WhatsApp messages with Locale’s WhatsApp Business Account (WABA) or if you have a WhatsApp Business Account, you can use your account.
To connect your own WhatsApp Business Account, Go to integration tab → select WhatsApp. Learn More

💡 Don’t Worry! If you don’t have a WhatsApp Business Account(WABA), you don’t need to buy and setup. Locale allows you to send WhatsApp alerts without need of having WhatsApp Business Account.
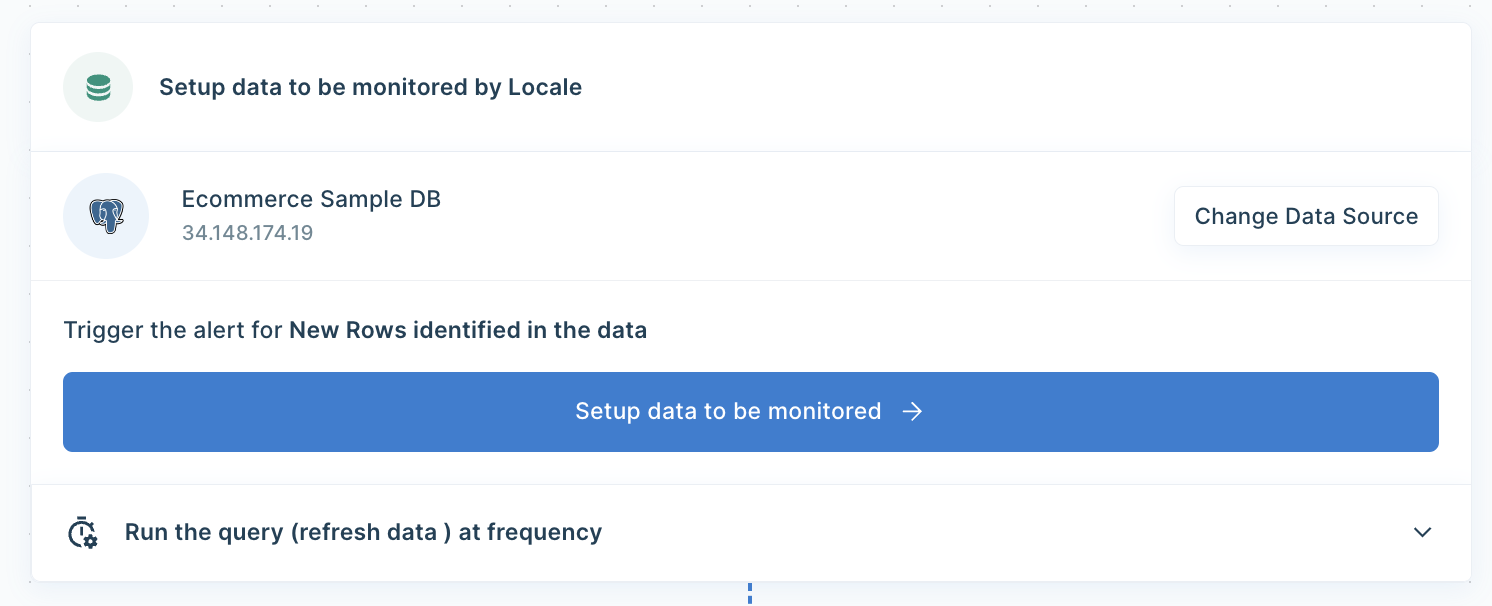
Step 2: Now go to Alerts → Create New Alerts. Choose your database → Click on Setup data to be monitored.
Step 3: Write your own SQL Query and click Run to verify the data. Once you are satisfied, click Done.

Step 4: Now Setup your schedule based on your requirement, this would automatically run the query based on the frequency you set. Click on Run the query at frequency and choose your schedule

Step 5: You can also configure the WhatsApp message to give the user a better idea. Click on Configure incidents and enter your message in the Incident Title.
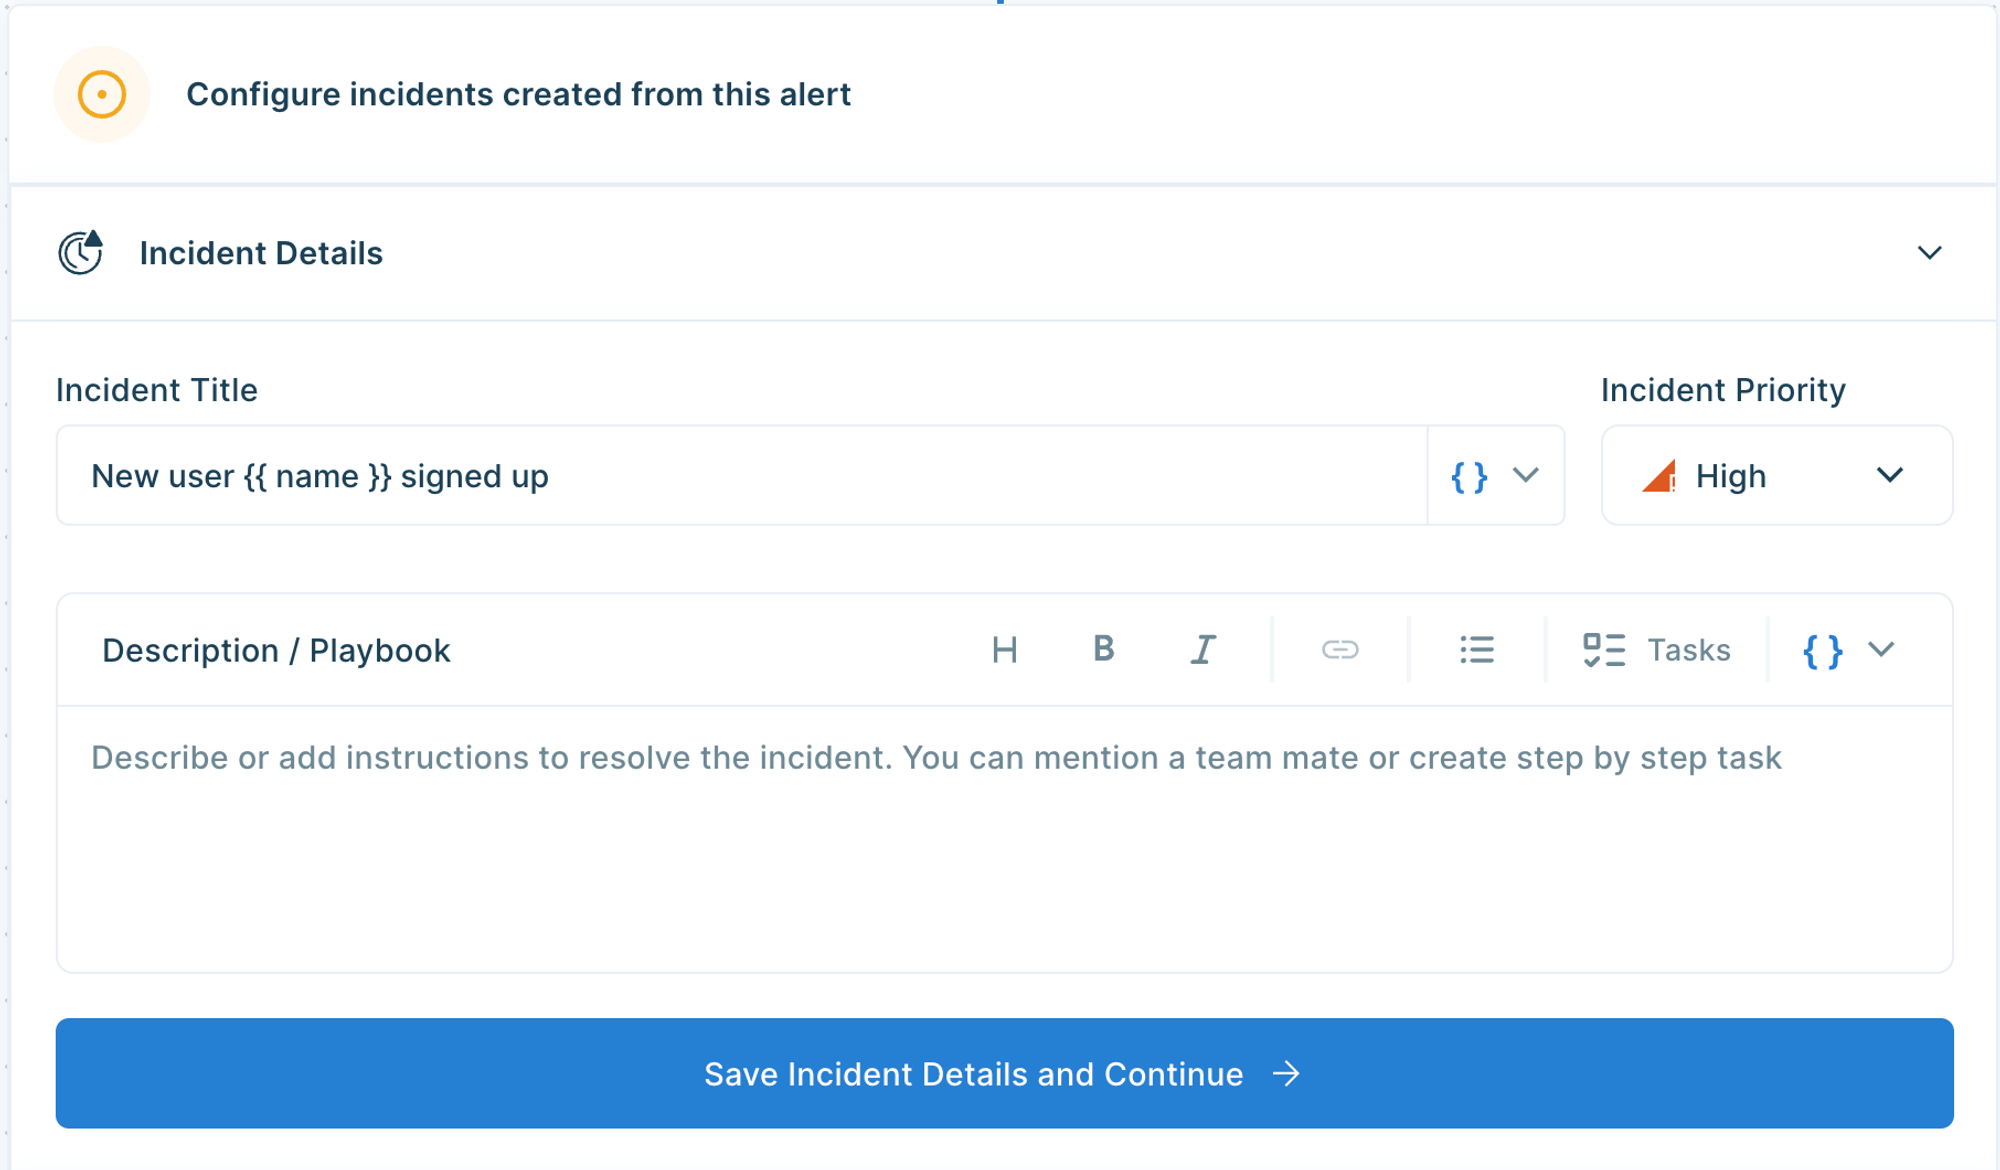
💡 You can also customise the message based on the query result by clicking on { } icon.
Step 6: Set up whom you want to send the alerts. Go to the Setup Notification section and click on Add Notification then select Send WhatsApp Message.
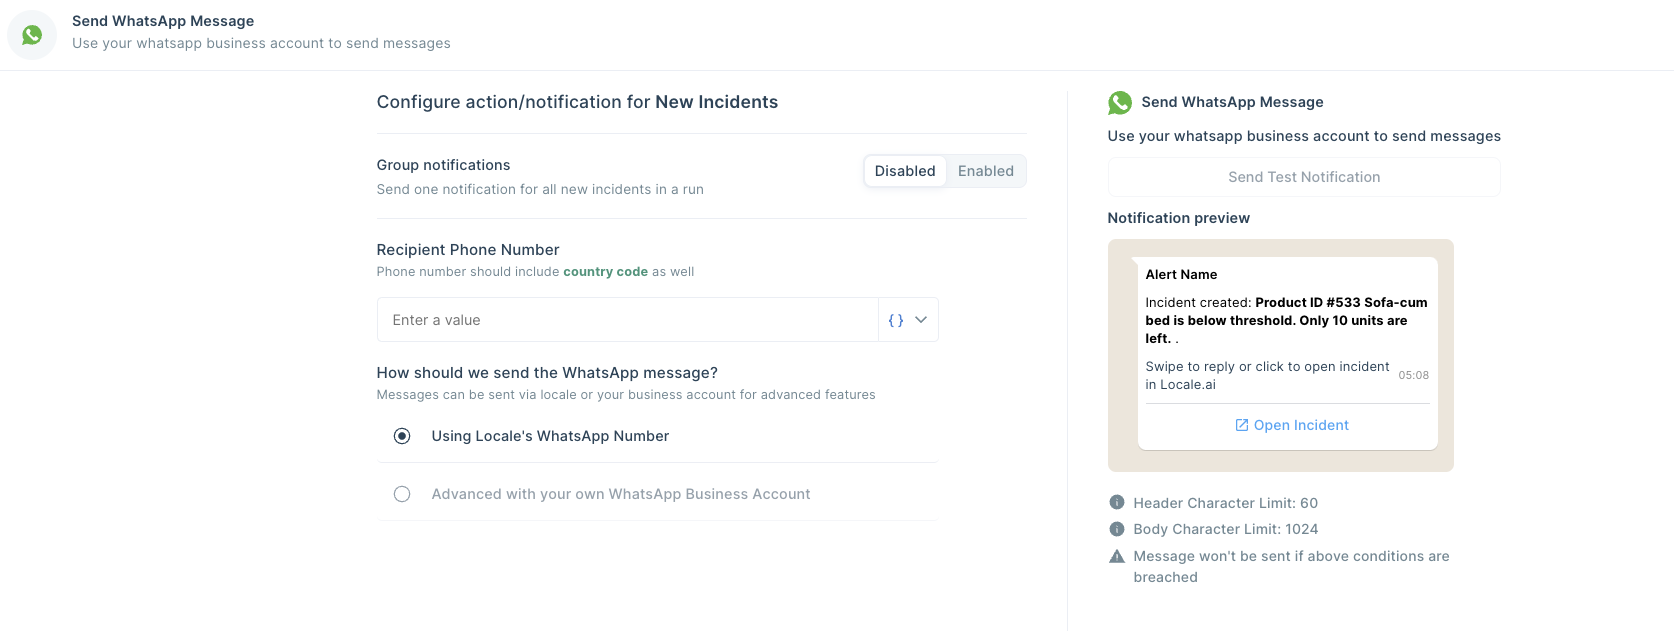
💡 If you want to trigger notifications dynamically on WhatsApp based on query results. You can do that by clicking on [ {} ] icon and selecting the user field.
Save the alert. It will automatically run itself and trigger a WhatsApp notification.
Conclusion
This blog has explored two distinct methods for automating PostgreSQL triggers to send notifications directly to WhatsApp.
The first method, a traditional approach, involves the creation of trigger functions and events within PostgreSQL, coupled with Python scripts to integrate with WhatsApp. This method comes with drawbacks such as complex setup, the necessity of a WhatsApp Business Account, and potential challenges in handling API errors and ensuring security.
On the other hand, the second method introduces a no-code solution through Locale, a platform that simplifies the process of sending data or triggering alerts to WhatsApp. By eliminating the need for an additional WhatsApp Business Account, Locale provides a more accessible and cost-effective alternative. This method is flexible in terms of customization, streamlines the integration process and reduces maintenance overhead.
Excited to get your hands dirty? Reserve early access by talking to us.

